If you are using a Dell laptop and don’t know how to split the screen then don’t worry here in this article I will share with you all the methods step by step which are easy to use. Also, it doesn’t matter whether you are using Windows 10 or Windows 11 operating system on your Dell laptop because the steps are almost the same for both OS.
Actually, the Splitting screen is a very useful feature for the programmer or coder or anyone who usually needs to work on multiple windows at a time without switching between them. So, if you’re a Dell laptop user and looking to optimize your productivity, then simply follow the steps below to get your work done efficiently in less time on your Dell laptop.
Ok, so now without wasting too much time let’s get started on how to split screen on a Dell laptop in different scenarios.
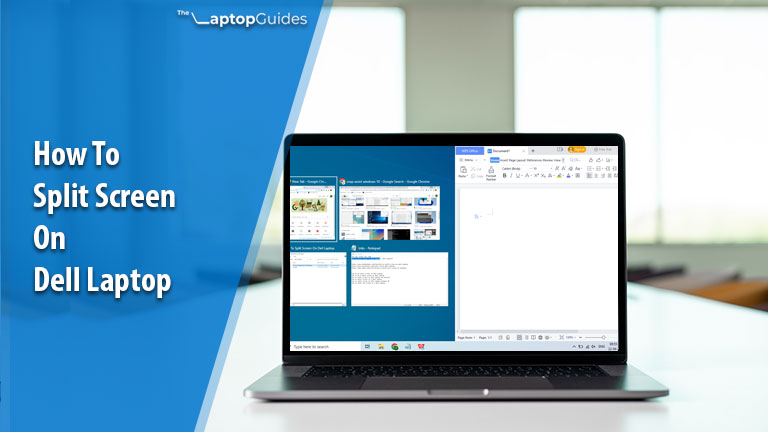
How To Split Screen On Dell Laptop?
1. Splitting The Screen With Windows Snap Assist
Well, there is a good thing for all Windows users is that Window’s inbuilt Snap Assist feature works on all the Windows OS versions such as Windows 7, 8, 10, and 11. Windows has launched this Snap Assist feature for the first time in Windows 7 operating system.
By using this feature you can see and work on multiple windows at a time without leaving the screen. For that, you just have to drag the window to the left or right corner of your laptop or desktop screen and it will automatically Snap into the position. And makes the rest of the screen free for other windows.
Also, there are many of you who might have a question that comes into mind is that it works on Windows-based laptops only, or works on desktops too? Hence, here I want to clear that doubt first, so it is good to know that it works the same for both laptops as well desktops. Here is how you can use the Snap Assist features:
Note: To use this Snap Assist feature there are two ways such as using a Mouse and using a Keyboard. So, choose the one which is suitable for you.
1) Snap With A Mouse
Step 1: Firstly, you have to open a window that you want to snap.
Step 2: Next, you just have to click and hold the title bar of that window and simply drag it on the left or right side of the screen.
Step 3: After that, need to release the mouse button and the window will automatically snap on the side of the screen where you have dragged it to.
Step 4: Now, open the second window which you want to work on and need to snap.
Step 5: Again, you need to do the same thing, like click and hold the title bar of this window but this time you need to drag it to the opposite side of the screen of the first window.
Step 6: This is also the same step that we have done for the first window, like releasing the mouse button, and the window will simply snap on the side of the screen where you have dragged it.
Step 7: Finally, we have done all the steps and now you have two windows snapped side by side on your Dell laptop.
2) Snap With A Keyboard
If you are not been able to understand the above steps then simply click on the Windows key + left or right arrow key on your keyboard. It will Snap the window as per the arrow key which you have pressed.
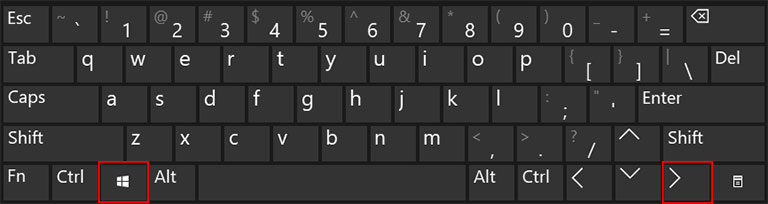
For instance, if you have pressed Win + right arrow key then a window will automatically Snap on the right side of your laptop screen.
2. How To Split Screen On Dell Laptop And External Monitor?
There are many of you who want to split the screen between the Dell laptop and an external monitor and they might be thinking that it is possible or not. So, here I want to tell you that it is possible by using the Extended Display mode. And for doing that you need to follow the steps below:
Step 1: You need to connect your laptop to an external monitor first.
Step 2: Then press on Windows + P key on your laptop keyboard and select the “Extended” option from the side panel.
Step 3: Next, to use the Snap Assist feature you have to open at least two windows or apps like previously we have done.
Step 4: Now, you need to move the cursor on the title bar of any of the single window and simply hold and drag it to the left or right side of your laptop/desktop screen. It will automatically Snap into position and keep the rest of the screen free for another window.
Step 5: After that, similarly drag another window to the empty screen and it will also snap automatically into the empty position.
Final Verdict
On a conclude, I just want to say that this is a really very useful feature as I have said at the beginning of this article too. And the best thing is that it doesn’t matter which Windows version are you using because the Snap Assist feature is available from Windows 7 to the latest Windows 11.
So, after knowing this feature now splitting the screen you can do your work efficiently by opening multiple windows simultaneously. By following the above guide on how to split the screen on a Dell laptop you can boost your work productivity.
I hope that this article would be helpful for you, if it is then share it with your friends on your social media accounts.

Hi! I am Rupesh Hingu a tech enthusiast, especially for laptops, and been in the tech industry for the last 7 years. I am passionate about blogging and love to review laptops and write in-depth buying guides and how-to tips.